Here below we explained how to import demo.
Automatic import
- Log into your WordPress Dashboard.
- Navigate “Install Demos” tab in your admin sidebar. Select the demo you wish to import.
- Installing a demo provides pages, posts, images, theme options, widgets, sliders and more.
- The required plugins need to be installed and activated before you install a demo.
- Click Install button to install the demos.
- A popup window will open with the message and requirements. Meet the requirements and then click Ok to install it.
- It can take a few minutes to import everything. Please be patient to import completely.
- Also, you can uninstall the demo what you already installed.
Here below we explained how to import demo manually.
Manual import
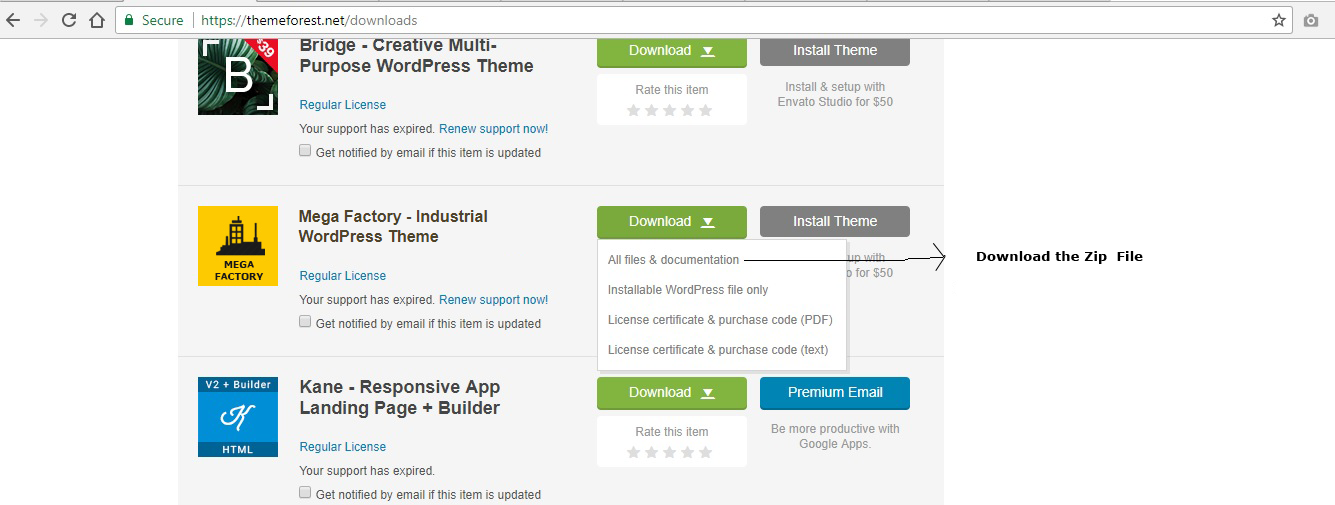
Download the zip file from ThemeForest.
- Log into your WordPress Dashboard.
- Navigate Appearance tab in your admin sidebar and select Themes.
- Themes > Add New
- Upload New theme and you just activate the theme.
How to Demo Import by Manual?
Step 1:
Theme Installation: Admin Dashboard –>> Appearance –>> Themes –>> Just activate our theme.
Plugin Installation: Admin Dashboard –>> Theme(Our Theme Name) –>> Plugins –>> Install and Activate All required plugins.
1. Theme Core Plugin
2. Contact Form 7
3. Woocommerce( If Woocommerce Integrated Theme)
4. Slider Revolution
5. WPBakery Visual Composer
6. For widget import plugin:
Plugins –>> Add New –>> Plugin name is “Widget Importer and Exporter” have to install and activate this plugin.
https://wordpress.org/plugins/widget-importer-exporter/
System Status: Open with “System Status” tab must have the like below image.
Manual Import Files: All files you get from Envato market, click and download like the below image.
1. theme.xml
2. widgets.wie
3. theme-options.json
4. custom-sidebars.json
5. rev_slider1
Step 2:
Theme Options Import:
Just open theme-options.json file and copy text and paste to Theme options > Import/Export > Import from file > paste > import. Save theme options.
Step 3:
XML Import:
Ready to all import files.
In admin dashboard You can find Tools > import > WordPress > Run importer > Choose upload theme.xml file and to import.
1. Import author: technology (technology).
2. Import author: zozothemes (zozo_user).
After, here you can choose your username and both are same.
All are must have like the below images.
Click the Submit button.
Step 4:
Create Custom Sidebars:
You can edit the custom-sidebars.json file with any text editors( ex: notepad, notepad++ and sublime editors).
Admin Dashboard –>> Appearance –>> Custom Sidebars –>> Add Sidebar( Here you can create your custom sidebars).
You can create one after another.
Follow the below images:
Widgets Import:
For widget import plugin:
In admin dashboard You can find Tools > Widget Importer and Exporter Settings >> Import Widgets and Choose file with (.wie format) and import your widgets.
Now files are imported, you need to set up some settings by manual(menus and front page).
Step 5:
Import Revolution sliders:
Wordpress Dashboard –> Revolution Slider –> You can see import slider tab –> here you can select and import sliders one by one.
Automatically Slider particular Slider will assign to Exact home page and pages.
Menus Settings:
Step1: Select a menu to edit: “Primary Menu”.
In admin dashboard >> Appearance >> Menus >> You must select the “Primary Menu” like the below image.
Choose Your Front Page:
In admin dashboard >> Settings >> Reading >> Reading Settings >> A static page (select below) >> Home Page (Select your home page).


